


Even a few years ago, web application development was not what it is today. Nowadays, there are so many options that the uninitiated are frequently perplexed as to what is best for them. This applies not only to the overall stack but also to the development tools; there are so many options. This blog tutorial asserts that the MERN stack is ideal for developing a full web application, and it walks the reader through the entire process in a very detailed manner.
So, what exactly is the MERN stack?

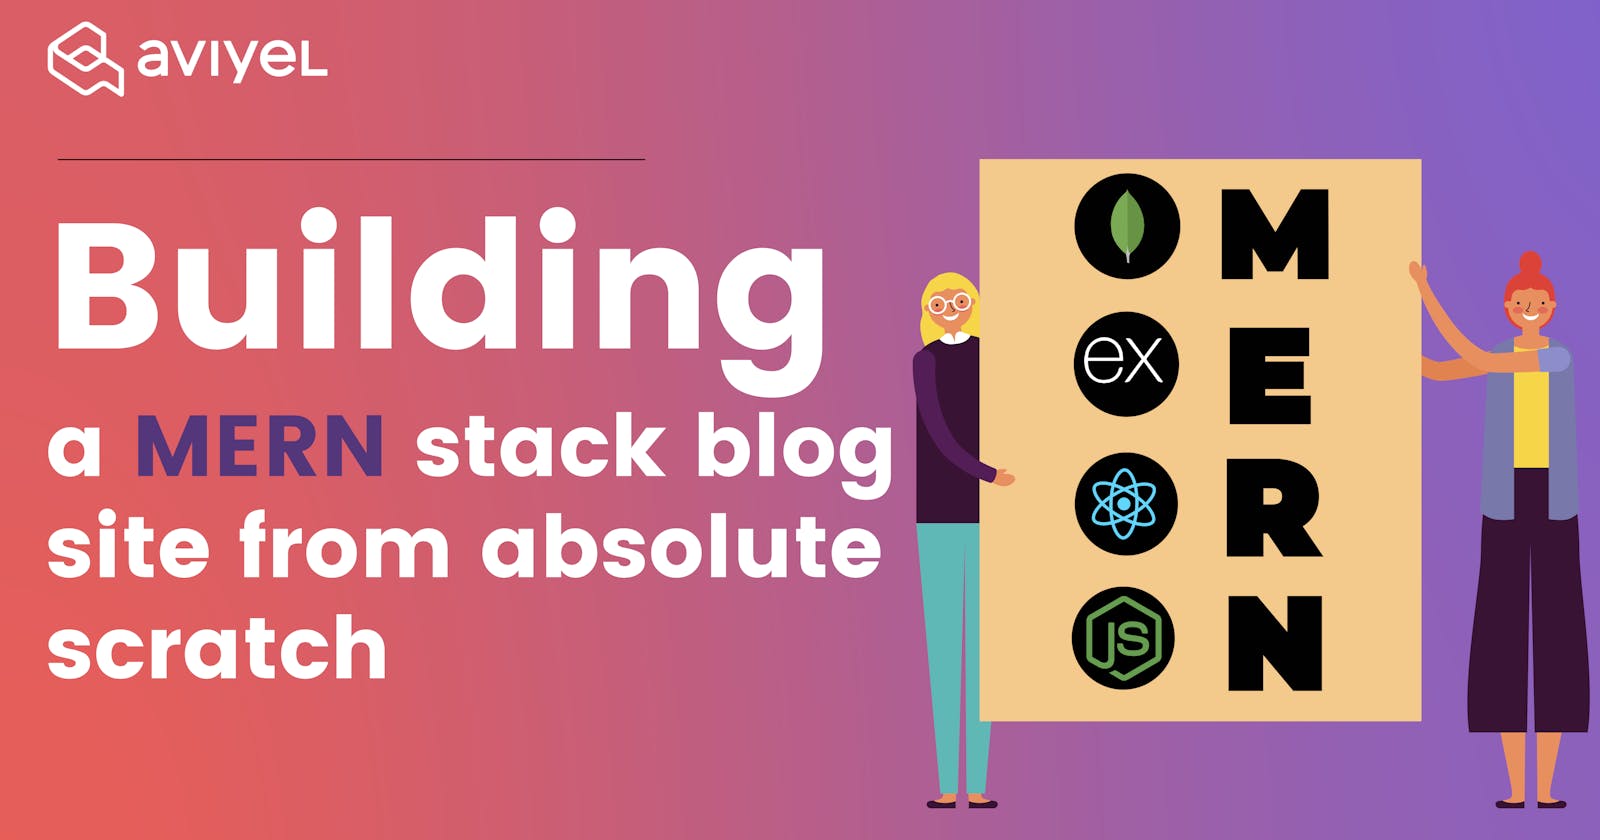
The MERN stack is a popular set of technologies for creating a modern Single Page Application (SPA). MERN stands for MongoDB, Express, React, and Node.js:
Node.js is a popular server-side framework that allows us to run JavaScript code on a web server.
Express is a Node.js web application framework that makes Node application development simpler and faster.
MongoDB is a NoSQL database that stores data persistently in the form of collections and documents.
React is a JavaScript frontend library for creating user interfaces.
In this blog tutorial, we will create a full-stack blog application that performs CRUD operations by utilizing the MERN stack. This blog tutorial should help you understand the fundamental operations of the MERN stack.
Here is our application's final sneak peek.

Setting up the backend
Create a two folder name client and server inside your project directory, then open it inside the Visual Studio Code or any code editor of your choice.


Now, we'll begin by configuring our backend with npm and installing necessary packages, followed by configuring a MongoDB database, configuring a server with Node and Express, designing a database schema to define our Blog, and configuring API routes to create, read, update, and delete blog data and information from the database. so, now navigate to your server's directory and run the code below from the command prompt.
npm init -y
Updating package.json
To install the dependencies, execute the following commands in the terminal.
npm install cors express dotenv mongoose nodemon body-parser


The "package.json" file should look like this after the dependencies have been installed.

And also, remember to update the scripts and type as well.

Now, navigate to your server directory and create a server.js file within it.
Configuring server.js
Import express module.
Import bodyParser module
Import mongoose module
Import CORS module
Use express() to start our app.
```javascript //server.js import express from "express"; import bodyParser from "body-parser"; import mongoose from "mongoose"; import cors from "cors";
const app = express();
Now we can use all of the different methods on that app instance. First, let's do some general setup. We'll use app.use and simply pass the bodyParser and limit it by 20 to 50mb because we're sending some images that can be very large in size, and we'll also specify the extended to true and do the same thing with the bodyParser URL encoded and pass the same parameter and now we are also going to use the CORS and call it as a function.

```javascript
//server.js
import express from "express";
import bodyParser from "body-parser";
import mongoose from "mongoose";
import cors from "cors";

const app = express();

app.use(bodyParser.json({ limit: '50mb', extended: true }))
app.use(bodyParser.urlencoded({ limit: '50mb', extended: true }))
app.use(cors());
Now it's time to link our server application to the real database, so we'll utilize the MongoDB database, especially the MongoDB cloud Atlas version, which means we'll be hosting our database onto their cloud.
Setting up MongoDB cloud cluster
MongoDB is a document-oriented database that is open source and cross-platform. MongoDB is a NoSQL database that stores data in JSON-like documents with optional schemas. MongoDB is a database created and distributed by MongoDB Inc. under the provisions of the Server Side Public License.
Official MongoDB website

Sign in to MongoDB

Create a Project

Adding members

Building a database

Creating a cluster

Selecting a cloud service provider

Make a cluster and wait for the cluster to be built before proceeding (usually takes around 5 -10 minutes)

Navigate to the network access tab and select "Add IP address."

In the database, create a user. You'll need the username and password for the MongoDB URI and finally, create a database user.

Now, select the Choose a connection method.

Connect your application by clicking on it and finally select the correct driver and version.


Now, inside server.js create a new variable and name it DB_CONNECTION. Inside it, create a string and simply paste the copied mongo DB connection URL. Now, inside it, enter your username and password, making sure to remove all the brackets and enter your own credentials. We'll secure the credential later by creating environmental variables, but for now, let's add it this way. The second thing we need is a PORT, so simply enter the port number, for now, 6000, and finally, we will use mongoose to connect to our database, so enter mongoose. connect() which is a function with two different parameters. The first will be the DB CONNECTION, and the second will be an object with two different options. The first is useNewUrlParser, which we will set to true, and the second is useUnifiedTopology, which we will also set to true. These objects are not required, but we will see some errors or warnings on our console. Following that, let's chain a.then() and.catch() because this will return a promise, so inside .then() will call the app and invoke listen, which has two parameters, the first of which is PORT and the second of which is the callback function that will be executed if our application is successfully connected and finally, if the connection to the database is not successful we will simply console log our error message.
//server.js
import express from "express";
import bodyParser from "body-parser";
import mongoose from "mongoose";
import cors from "cors";
import dotenv from "dotenv";

dotenv.config();

const app = express();

app.use(bodyParser.json({ limit: "50mb", extended: true }));
app.use(bodyParser.urlencoded({ limit: "50mb", extended: true }));
app.use(cors());

const DB_CONNECTION = process.env.DATABASE_URL;
const PORT = process.env.PORT || 6000;

mongoose
  .connect(DB_CONNECTION, { useNewUrlParser: true, useUnifiedTopology: true })
  .then(() =>
    app.listen(PORT, () =>
      console.log(`Server is running @ : http://localhost:${PORT}`)
    )
  )
  .catch((error) => console.error(error));
Insert mongodb+srv into the .env file.
PORT=4000
DATABASE_URL=mongodb+srv://admin:<password>@cluster0.ddtsa.mongodb.net/myFirstDatabase?retryWrites=true&w=majority
That's it; we've successfully linked our server to the database.
Now that we've successfully connected to our database, let's get started on creating our routes for our backend application. To do so, we'll need to create a new folder inside the server called routes Within the routes folder, we will create a js file called blogPosts.routes.js.
This is what your folder structure should look like.

We are going to add all of the routes inside of blogPosts.routes.js, so first we must import express from "express" and also configure our router. Now we can begin adding our routes to it.
// routes/blogPosts.routes.js
import express from "express";

const router = express.Router();

router.get("/", (req, res) => {
  res.send("Awesome MERN BLOG");
});

export default router;
Let's get started on your server. js file and import the blogPost route. Now we can use express middleware to connect this blogPost to our application
// server.js
import express from "express";
import bodyParser from "body-parser";
import mongoose from "mongoose";
import cors from "cors";
import dotenv from "dotenv";

import blogPosts from "./routes/blogPosts.js";

dotenv.config();

const app = express();

app.use(bodyParser.json({ limit: "50mb", extended: true }));
app.use(bodyParser.urlencoded({ limit: "50mb", extended: true }));
app.use(cors());

// remember to add this after cors
app.use("/api/blogs", blogPosts);

const DB_CONNECTION = process.env.DATABASE_URL;
const PORT = process.env.PORT || 6000;

mongoose
  .connect(DB_CONNECTION, {
    useNewUrlParser: true,
    useUnifiedTopology: true,
  })
  .then(() =>
    app.listen(PORT, () =>
      console.log(`Server is running at: http://localhost:${PORT}`)
    )
  )
  .catch((error) => console.log(error));
Before we go any further, let's create a folder structure for our backend applications that will allow them to be much more scalable. So let’s create a new folder called controllers inside the controllers’ folder we are also going to create a file called blogPosts.controller.js .So controllers is simply a file that contains route-specific logic. so your blogPosts.routes.jsand blogPosts.controller.jsshould resemble something like this.

//routes/blogPosts.routes.js
import express from 'express';

import { getAllBlogPosts } from '../controllers/blogPosts.controller.js';

const router = express.Router();

router.get('/', getAllBlogPosts);

export default router;
blogPosts.controller.js
//controllers/blogPosts.controller.js
import express from "express";
import mongoose from "mongoose";

const router = express.Router();

export const getAllBlogPosts = (req, res) => {
  res.send("Awesome MERN BLOG");
};

export default router;
Let's make a new model for our blog posts, so make a folder called models and a file called blogs.js inside it.
The folder structure should resemble something like this

// models/blogs.js
import mongoose from "mongoose";

const blogSchema = mongoose.Schema({
  title: String,
  description: String,
  tags: [String],
  fileUpload: String,
  upvote: {
    type: Number,
    default: 0,
  },
  creator: String,
  createdAt: {
    type: Date,
    default: new Date(),
  },
});

var BlogPost = mongoose.model("BlogArticle", blogSchema);

export default BlogPost;
Let's start adding more routes now that our model is complete.
// routes/blogPosts.routes.js
import express from "express";

import {
  getAllBlogPosts,
  addBlogPost,
  getSinglePost,
  updateSingleBlogPost,
  removeSingleBlogPost,
  likeBlogPost,
} from "../controllers/blogPosts.controller.js";

const router = express.Router();

router.get("/", getAllBlogPosts);
router.post("/", addBlogPost);
router.get("/:id", getSinglePost);
router.patch("/:id", updateSingleBlogPost);
router.delete("/:id", removeSingleBlogPost);
router.patch("/:id/likeedBlogPost", likeBlogPost);

export default router;
Now, inside the controller's folder, add the following code to your blogPosts.controllers.js file.
getAllBlogPosts method fetches all the blogs information.
export const getAllBlogPosts = async (req, res) => {
  try {
    const blogPosts = await BlogPost.find();
    res.status(200).json(blogPosts);
  } catch (error) {
    res.status(404).json({ message: error.message });
  }
};
addBlogPost method adds/insert only one blog
export const addBlogPost = async (req, res) => {
  const { title, description, fileUpload, creator, tags } = req.body;

  const createNewPost = new BlogPost({
    title,
    description,
    fileUpload,
    creator,
    tags,
  });

  try {
    await createNewPost.save();
    res.status(201).json(createNewPost);
  } catch (error) {
    res.status(409).json({ message: error.message });
  }
};
getSinglePost method fetches single blog post
export const getSinglePost = async (req, res) => {
  const { id } = req.params;

  try {
    const singlepost = await BlogPost.findById(id);

    res.status(200).json(singlepost);
  } catch (error) {
    res.status(404).json({ message: error.message });
  }
};
updateSingleBlogPost method updates single blog posts
export const updateSingleBlogPost = async (req, res) => {
  const { id } = req.params;
  const { title, description, creator, fileUpload, tags } = req.body;

  if (!mongoose.Types.ObjectId.isValid(id))
    return res.status(404).send(`post ${id} not found`);

  const updatedBlogPost = {
    creator,
    title,
    description,
    tags,
    fileUpload,
    _id: id,
  };
  await BlogPost.findByIdAndUpdate(id, updatedBlogPost, { new: true });
  res.json(updatedBlogPost);
};
removeSingleBlogPost method deletes single blog posts
export const removeSingleBlogPost = (req, res) => {
  const { id } = req.params;

  if (!mongoose.Types.ObjectId.isValid(id))
    return res.status(404).send(`post ${id} not found`);

  await BlogPost.findByIdAndRemove(id);

  res.json({ message: "Successfully deleted" });
};
likeBlogPost method upvotes the posts
export const likeBlogPost = async (req, res) => {
  const { id } = req.params;

  if (!mongoose.Types.ObjectId.isValid(id))
    return res.status(404).send(`No post with id: ${id}`);

  const post = await BlogPost.findById(id);

  const updatedBlogPost = await BlogPost.findByIdAndUpdate(
    id,
    { upvote: post.upvote + 1 },
    { new: true }
  );

  res.json(updatedBlogPost);
};
Your blogPosts.controller.js should resemble something like this
// blogPosts.controller.js
import express from "express";
import mongoose from "mongoose";

import BlogPost from "../models/blogs.js";

const router = express.Router();

export const getAllBlogPosts = async (req, res) => {
  try {
    const blogPosts = await BlogPost.find();
    res.status(200).json(blogPosts);
  } catch (error) {
    res.status(404).json({ message: error.message });
  }
};

export const addBlogPost = async (req, res) => {
  const { title, description, fileUpload, creator, tags } = req.body;

  const createNewPost = new BlogPost({
    title,
    description,
    fileUpload,
    creator,
    tags,
  });

  try {
    await createNewPost.save();
    res.status(201).json(createNewPost);
  } catch (error) {
    res.status(409).json({ message: error.message });
  }
};

export const getSinglePost = async (req, res) => {
  const { id } = req.params;

  try {
    const singlepost = await BlogPost.findById(id);

    res.status(200).json(singlepost);
  } catch (error) {
    res.status(404).json({ message: error.message });
  }
};

export const updateSingleBlogPost = async (req, res) => {
  const { id } = req.params;
  const { title, description, creator, fileUpload, tags } = req.body;

  if (!mongoose.Types.ObjectId.isValid(id))
    return res.status(404).send(`post ${id} not found`);

  const updatedBlogPost = {
    creator,
    title,
    description,
    tags,
    fileUpload,
    _id: id,
  };
  await BlogPost.findByIdAndUpdate(id, updatedBlogPost, { new: true });
  res.json(updatedBlogPost);
};

export const likeBlogPost = async (req, res) => {
  const { id } = req.params;

  if (!mongoose.Types.ObjectId.isValid(id))
    return res.status(404).send(`No post with id: ${id}`);

  const post = await BlogPost.findById(id);

  const updatedBlogPost = await BlogPost.findByIdAndUpdate(
    id,
    { upvote: post.upvote + 1 },
    { new: true }
  );

  res.json(updatedBlogPost);
};

export const removeSingleBlogPost = async (req, res) => {
  const { id } = req.params;

  if (!mongoose.Types.ObjectId.isValid(id))
    return res.status(404).send(`post ${id} not found`);

  await BlogPost.findByIdAndRemove(id);

  res.json({ message: "Successfully deleted" });
};

export default router;
After restarting the server, you should see something similar to this:

Configuring our Frontend
We'll start by setting up our frontend first using create-react-app .We will be creating the UI and its functionalities from the ground up. Let's get started on our application now.
Installing react application
Let us begin with the frontend part and craft it using react. So, if Node.js isn't already installed on your system, the first thing you should do is install it. So, go to the official Node.js website and install the correct and appropriate version. We need node js so that we can use the node package manager, also known as NPM.
Now, open client folder inside the code editor of your choice. For this tutorial, I will be using VScode. Next step, let’s open the integrated terminal and type npx create-react-app . this command will create the app inside the current directory and that application will be named as client

It usually takes only a few minutes to install. Normally, we would use npm to download packages into the project, but in this case, we are using npx, the package runner, which will download and configure everything for us so that we can start with an amazing template. It's now time to start our development server, so simply type npm start, and the browser will automatically open react-app.

React boilerplate cleanup
Before we begin building our projects, we must first clean them up by removing some of the files provided by create-react-app. Your src files should look like this after you've cleaned them up.

Installing some packages
We will need to install a few third-party packages for this project. so copy and paste the following command into your terminal
npm install @material-ui/core axios moment react-file-base64 redux react-redux redux-thunk
After installing all these packages your packge.json file should look like this:

After we've installed all of our project's dependencies, let's add two components to it and call them Blogs, BlogPosts and BlogPostsForm.

Now that we've got everything set up, let's go over to our App.js file and start writing some code but before that lets create one Assets folder inside our src folder and add the logo image of yor choice. After that, make another folder called styles, and inside it, make a file called app.styles.js, and paste the following code inside it.
// src/styles/app.styles.js
import { makeStyles } from "@material-ui/core/styles";

export default makeStyles(() => ({
  navigationBar: {
    borderRadius: 10,
    margin: "6px 0px",
    display: "flex",
    flexDirection: "row",
    justifyContent: "center",
    alignItems: "center",
  },
  title: {
    color: "#8661d1",
    fontFamily: "Poppins",
    fontStyle: "bold",
  },
  image: {
    marginRight: "25px",
  },
}));
Finally, go to App.js and import all of the necessary component files, styles, and components from the core material ui library, then implement it as follows.
//App.js
import React, { useState, useEffect } from "react";
import "./App.css";
import { Container, AppBar, Typography, Grow, Grid } from "@material-ui/core";
import blogLogo from "./Assets/blogLogo.gif";
import BlogPosts from "./components/BlogPosts";
import BlogPostsForm from "./components/BlogPostsForm";
import useStyles from "./styles/app.styles.js";

function App() {
  const appStyles = useStyles();

  return (
    <div className="App">
      <Container maxWidth="xl">
        <AppBar
          className={appStyles.navigationBar}
          position="static"
          color="inherit"
        >
          <img
            className={appStyles.image}
            src={blogLogo}
            alt="icon"
            height="100"
          />
          <Typography className={appStyles.title} variant="h4" align="center">
            Mern awesome blog
          </Typography>
        </AppBar>
        <Grow in>
          <Container>
            <Grid
              container
              justify="space-between"
              alignItems="stretch"
              spacing={2}
            >
              <Grid item xs={12} sm={7}>
                <BlogPostsForm />
              </Grid>
              <Grid item xs={12} sm={4}>
                <BlogPosts />
              </Grid>
            </Grid>
          </Container>
        </Grow>
      </Container>
    </div>
  );
}

export default App;
Now lets finally connect our frontend with the backend . so for that lets create a folder name api and inside it create a file name api.js . So let's import axios to make api calls, then specify our backend server url and write a function that simply fetches the post using axios.
import axios from "axios";

const url = "http://localhost:4000/api/blogs";

export const fetchAllBlogPosts = () => axios.get(url);
Now, let's focus on adding redux functionality to our react application because all of our backend actions will be done with redux, so we need to dispatch those actions. To do that, let's create some files and folders to structure it so that our application can be scalable.So, inside our src folder, create a folder called actions as well as a folder called reducers, and inside both of those folders, create a file called blogPosts.js
Your folder structure should resemble something like this.

Before we proceed, let's fix our index.js file so that we can begin using redux from within it. Inside that file, let's import provider, which will keep track of the store, which is the global state, and which will allow us to access the store from anywhere within the application so that we don't have to be on the parent or even the child component so that we can easily access that state from anywhere, and after that, let's import createStore, applyMiddleware, and compose from the redux package, and finally, let's import thunk from redux-thunk and let's setup our index.js file accordingly.
//index.js
import React from "react";
import ReactDOM from "react-dom";
import { Provider } from "react-redux";
import { createStore, applyMiddleware, compose } from "redux";
import thunk from "redux-thunk";
import { reducers } from "./reducers/blogPosts.js";
import App from "./App";
import "./index.css";

const store = createStore(reducers, compose(applyMiddleware(thunk)));

ReactDOM.render(
  <Provider store={store}>
    <App />
  </Provider>,
  document.getElementById("root")
);
If you run your application now, you may encounter the module not found error.

Let's go to our reducer folder and fix that error, so let's create an index.js file inside it and import combineReducers from the redux package, export and call that combineReducers as a function, and put an object inside of it. Now we can imlement all of the individual reducers that we have in this application case, which is only going to have blogPosts.
// reducers/index.js
import { combineReducers } from "redux";
import blogPosts from "./blogPosts";

export const reducers = combineReducers({ blogPosts });

If everything went well, your application should be running smoothly at this point. We now need to dispatch our action within our main App.js file.
// App.js
import React, { useEffect } from "react";
import "./App.css";
import { Container, AppBar, Typography, Grow, Grid } from "@material-ui/core";
import blogLogo from "./Assets/blogLogo.gif";
import Blogs from "./components/Blogs";
import BlogPostsForm from "./components/BlogPostsForm";
import useStyles from "./styles/app.styles.js";
import { useDispatch } from "react-redux";
import { fetchAllBlogPosts } from "./actions/blogPosts";

function App() {
  const dispatch = useDispatch();
  const appStyles = useStyles();

  useEffect(() => {
    dispatch(fetchAllBlogPosts());
  }, [dispatch]);

  return (
    <div className="App">
      <Container maxWidth="xl">
        <AppBar
          className={appStyles.navigationBar}
          position="static"
          color="inherit"
        >
          <img
            className={appStyles.image}
            src={blogLogo}
            alt="icon"
            height="100"
          />
          <Typography className={appStyles.title} variant="h2" align="center">
            Mern awesome blog
          </Typography>
        </AppBar>
        <Grow in>
          <Grid
            container
            justifyContent="space-between"
            alignItems="stretch"
            spacing={2}
          >
            <Grid item xs={12} sm={3}>
              <BlogPostsForm />
            </Grid>
            <Grid item xs={12} sm={9}>
              <Blogs />
            </Grid>
          </Grid>
        </Grow>
      </Container>
    </div>
  );
}

export default App;
Now, let's go over to our actions and import our api, and then create some Action creators, which are simply functions that return actions, so let's actually implement redux to pass or dispatch the function from data from our backend .
// actions/blogPosts.js
import * as api from "../api/api.js";

export const fetchAllBlogPosts = () => async (dispatch) => {
  try {
    const { data } = await api.fetchAllBlogPosts();

    dispatch({ type: GET_ALL_BLOGS, payload: data });
  } catch (error) {
    console.log(error.message);
  }
};
Finally, let us return to our reducers and handle the logic of getting and fetching all of the blog posts.
// reducers/blogPosts.js
export default (posts = [], action) => {
  switch (action.type) {
    case "GET_ALL_BLOGS":
      return action.payload;
    default:
      return posts;
  }
};
Now, let's actually retrieve these data from our child components, so let's go to our Blogs component and fetch the data from the global redux store we can do that by the help of useSelector
//components/Blogs
import React from "react";
import { Grid, CircularProgress } from "@material-ui/core";
import { useSelector } from "react-redux";

import BlogPosts from "../BlogPosts";
import useStyles from "./styles";

const Blogs = () => {
  const posts = useSelector((state) => state.blogPosts);
  const classes = useStyles();

  console.log("this is post", posts);

  return (
    <>
      <BlogPosts />
    </>
  );
};

export default Blogs;
When you run your app, you may see an empty array and a network error; to fix this, simply include a proxy in your package.json file

So, if you still see that empty array, it means that the data was successfully fetched, and it is now time to implement the form so that we can make a post request to our database and actually add new posts to it.
So for that lets head over to the BlogPostsForm component and create a form. First step lets import all the component from material ui core library that we are going to implement in our form
// BlogPostsForm.js
import React, { useState, useEffect } from "react";
import { Paper, TextField, Typography, Button } from "@material-ui/core";
import { useDispatch, useSelector } from "react-redux";
import FileBase from "react-file-base64";

import useStyles from "./styles";
import { addBlogPosts, editBlogPosts } from "../../actions/blogPosts";

const BlogPostsForm = ({ blogPostId, setBlogPostId }) => {
  const [blogInfo, setBlogInfo] = useState({
    creator: "",
    title: "",
    description: "",
    tags: "",
    fileUpload: "",
  });
  const post = useSelector((state) =>
    blogPostId
      ? state.posts.find((message) => message._id === blogPostId)
      : null
  );
  const dispatch = useDispatch();
  const blogPostsStyles = useStyles();

  useEffect(() => {
    if (post) setBlogInfo(post);
  }, [post]);

  const handleSubmit = async (e) => {
    e.preventDefault();

    if (blogPostId === 0) {
      dispatch(addBlogPosts(blogInfo));
    } else {
      dispatch(editBlogPosts(blogInfo));
    }
  };

  return (
    <Paper className={blogPostsStyles.paper}>
      <form
        autoComplete="on"
        noValidate
        className={`${blogPostsStyles.root} ${blogPostsStyles.form}`}
        onSubmit={handleSubmit}
      >
        <Typography variant="h5">
          {blogPostId ? `Update "${post.title}"` : "✨ Create a blog ✨"}
        </Typography>

        <div className={blogPostsStyles.chooseFile}>
          <Typography> 🖼️ Upload Blog Image</Typography>
          <FileBase
            type="file"
            multiple={false}
            onDone={({ base64 }) =>
              setBlogInfo({ ...blogInfo, fileUpload: base64 })
            }
          />
        </div>
        <TextField
          name="title"
          variant="outlined"
          label="🔥 Blog Title"
          fullWidth
          value={blogInfo.title}
          onChange={(e) => setBlogInfo({ ...blogInfo, title: e.target.value })}
        />
        <TextField
          name="description"
          variant="outlined"
          label="📙 Blog Description"
          fullWidth
          multiline
          rows={7}
          value={blogInfo.description}
          onChange={(e) =>
            setBlogInfo({ ...blogInfo, description: e.target.value })
          }
        />
        <TextField
          name="creator"
          variant="outlined"
          label="✍️ Author name"
          fullWidth
          value={blogInfo.creator}
          onChange={(e) =>
            setBlogInfo({ ...blogInfo, creator: e.target.value })
          }
        />
        <Typography>Tags (5 max seperated by comma)</Typography>
        <TextField
          name="tags"
          variant="outlined"
          label="🏷️ Tags"
          fullWidth
          value={blogInfo.tags}
          onChange={(e) =>
            setBlogInfo({ ...blogInfo, tags: e.target.value.split(",") })
          }
        />

        <Button
          className={blogPostsStyles.publishButton}
          variant="contained"
          color="secondary"
          size="large"
          type="submit"
        >
          Publish 📝
        </Button>
      </form>
    </Paper>
  );
};

export default BlogPostsForm;
Also, don't forget to modify the blogPostForm styles within styles. js
// components/BlogPostsForm/styles.js
import { makeStyles } from "@material-ui/core/styles";

export default makeStyles((theme) => ({
  root: {
    "& .MuiTextField-root": {
      margin: theme.spacing(1),
    },
  },
  paper: {
    padding: theme.spacing(5),
  },
  chooseFile: {
    width: "95%",
    margin: "10px 0",
  },
  publishButton: {
    marginBottom: 10,
  },
  form: {
    display: "flex",
    flexWrap: "wrap",
    justifyContent: "center",
  },
}));
So before going any further lets fix our api first
// api/api.js
import axios from "axios";

const url = "http://localhost:4000/api/blogs";

export const fetchBlogPosts = () => axios.get(url);
export const addNewBlogPost = (newBlog) => axios.post(url, newBlog);
export const editSingleBlogPost = (id, editedBlogPost) =>
  axios.patch(`${url}/${id}`, editedBlogPost);
After you've successfully added and exported the addNewBlogPost and editSingleBlogPost functions, let's actually implement them by creating some actions called addBlogPosts and editBlogPosts, respectively.
addBlogPosts action

editBlogPosts action

Your blogPosts.js actions should look something like this.
// actions/blogPosts.js
import * as api from "../api/api.js";

export const fetchAllBlogPosts = () => async (dispatch) => {
  try {
    const { data } = await api.fetchBlogPosts();

    dispatch({ type: "GET_ALL_BLOG_POST", payload: data });
  } catch (error) {
    console.log(error.message);
  }
};

export const addBlogPosts = (post) => async (dispatch) => {
  try {
    const { data } = await api.addNewBlogPost(post);

    dispatch({ type: "ADD_NEW_BLOG_POST", payload: data });
  } catch (error) {
    console.log(error.message);
  }
};

export const editBlogPosts = (id, post) => async (dispatch) => {
  try {
    const { data } = await api.editSingleBlogPost(id, post);

    dispatch({ type: "EDIT_SINGLE_BLOG_POST", payload: data });
  } catch (error) {
    console.log(error.message);
  }
};
After that, let's update the reducers section.
export default (posts = [], action) => {
    switch (action.type) {
        case "GET_ALL_BLOG_POST":
            return action.payload;
        case "ADD_NEW_BLOG_POST":
            return [...posts, action.payload];
        case "EDIT_SINGLE_BLOG_POST":
            return posts.map((post) =>
                post._id === action.payload._id ? action.payload : post
            );
        default:
            return posts;
    }
};
Finally, let's update our App.js to include the blogPostId state, which we'll pass as a prop to our BlogPostsForm and Blogs components.
//App.js
import React, { useState, useEffect } from "react";
import "./App.css";
import { Container, AppBar, Typography, Grow, Grid } from "@material-ui/core";
import blogLogo from "./Assets/blogLogo.gif";
import Blogs from "./components/Blogs";
import BlogPostsForm from "./components/BlogPostsForm";
import useStyles from "./styles/app.styles.js";
import { useDispatch } from "react-redux";
import { fetchAllBlogPosts } from "./actions/blogPosts";

function App() {
  const [blogPostId, setBlogPostId] = useState(0);
  const dispatch = useDispatch();
  const appStyles = useStyles();

  useEffect(() => {
    dispatch(fetchAllBlogPosts());
  }, [blogPostId, dispatch]);

  return (
    <div className="App">
      <Container maxWidth="xl">
        <AppBar
          className={appStyles.navigationBar}
          position="static"
          color="inherit"
        >
          <img
            className={appStyles.image}
            src={blogLogo}
            alt="icon"
            height="100"
          />
          <Typography className={appStyles.title} variant="h2" align="center">
            Mern awesome blog
          </Typography>
        </AppBar>
        <Grow in>
          <Grid
            container
            justifyContent="space-between"
            alignItems="stretch"
            spacing={2}
          >
            <Grid item xs={12} sm={3}>
              <BlogPostsForm
                blogPostId={blogPostId}
                setBlogPostId={setBlogPostId}
              />
            </Grid>
            <Grid item xs={12} sm={9}>
              <Blogs setBlogPostId={setBlogPostId} />
            </Grid>
          </Grid>
        </Grow>
      </Container>
    </div>
  );
}

export default App;
After we've fixed App.js, we'll move on to our Blogs component and use the passed props within it and also drill it to the BlogPosts components
// components/Blogs.js
import React from "react";
import { Grid, CircularProgress } from "@material-ui/core";
import { useSelector } from "react-redux";

import BlogPosts from "../BlogPosts";
import useStyles from "./styles";

const Blogs = ({ setBlogPostId }) => {
  const posts = useSelector((state) => state.posts);
  const classes = useStyles();

  console.log("this is post", posts);

  return !posts.length ? (
    <CircularProgress />
  ) : (
    <Grid
      className={classes.container}
      container
      alignItems="stretch"
      spacing={4}
    >
      {posts.map((post) => (
        <Grid key={post._id} item xs={12} sm={12}>
          <BlogPosts post={post} setBlogPostId={setBlogPostId} />
        </Grid>
      ))}
    </Grid>
  );
};

export default Blogs;
Now that we've completed almost everything, it's time to work on the individual blog posts. To do so, go to the BlogPosts components and install material UI icons first, then import several components from the material UI core library, and finally copy and paste the following code inside it.
// components/BlogPosts.js
import React from "react";
import {
  Typography,
  CardMedia,
  Button,
  Card,
  CardActions,
  CardContent,
} from "@material-ui/core/";
import ArrowUpwardIcon from "@material-ui/icons/ArrowUpward";
import DeleteIcon from "@material-ui/icons/Delete";
import EditIcon from "@material-ui/icons/Edit";
import moment from "moment";
import { useDispatch } from "react-redux";
import blogImageLogo from "../../Assets/blogLogo.gif";

import { upvoteBlogPosts, removeBlogPosts } from "../../actions/blogPosts";
import useStyles from "./styles";

const BlogPosts = ({ post, setCurrentId }) => {
  const dispatch = useDispatch();
  const blogPostStyles = useStyles();

  return (
    <>
      <Card className={blogPostStyles.blogContainer}>
        <CardMedia
          className={blogPostStyles.imageContainer}
          image={post.fileUpload || blogImageLogo}
          title={post.title}
        />{" "}
        <div className={blogPostStyles.nameOverlay}>
          <Typography variant="h6"> {post.creator} </Typography>{" "}
          <Typography variant="body2">
            {" "}
            {moment(post.createdAt).fromNow()}{" "}
          </Typography>{" "}
        </div>{" "}
        <div className={blogPostStyles.editOverlay}>
          <Button
            style={{
              color: "white",
            }}
            size="small"
            onClick={() => setCurrentId(post._id)}
          >
            <EditIcon fontSize="default" />
          </Button>{" "}
        </div>{" "}
        <div className={blogPostStyles.tagSection}>
          <Typography variant="body2" color="textSecondary" component="h2">
            {" "}
            {post.tags.map((tag) => `#${tag} `)}{" "}
          </Typography>{" "}
        </div>{" "}
        <Typography
          className={blogPostStyles.titleSection}
          gutterBottom
          variant="h5"
          component="h2"
        >
          {post.title}{" "}
        </Typography>{" "}
        <CardContent>
          <Typography variant="body2" color="textSecondary" component="p">
            {" "}
            {post.description}{" "}
          </Typography>{" "}
        </CardContent>{" "}
        <CardActions className={blogPostStyles.cardActions}>
          <Button
            size="small"
            color="primary"
            onClick={() => dispatch(upvoteBlogPosts(post._id))}
          >
            <ArrowUpwardIcon fontSize="small" /> {post.likeCount}{" "}
          </Button>{" "}
          <Button
            size="small"
            color="primary"
            onClick={() => dispatch(removeBlogPosts(post._id))}
          >
            <DeleteIcon fontSize="big" />
          </Button>{" "}
        </CardActions>{" "}
      </Card>{" "}
    </>
  );
};

export default BlogPosts;
Finally, let's create an action to actually upvote and remove the blog post. First, create a function inside API and name it upvoteSingleBlogPost and removeBlogPost, then export it.
// api/api.js
import axios from "axios";

const url = "http://localhost:4000/api/blogs";

export const fetchBlogPosts = () => axios.get(url);
export const addNewBlogPost = (newBlog) => axios.post(url, newBlog);
export const editSingleBlogPost = (id, editedBlogPost) =>
    axios.patch(`${url}/${id}`, editedBlogPost);
export const upvoteSingleBlogPost = (id) =>
    axios.patch(`${url}/${id}/likedBlogPost`);
export const removeBlogPost = (id) => axios.delete(`${url}/${id}`);
Finally, let us fix our reducers and we will be finished with our application.
// reducers/blogPosts.js
export default (posts = [], action) => {
    switch (action.type) {
        case "GET_ALL_BLOG_POST":
            return action.payload;
        case "ADD_NEW_BLOG_POST":
            return [...posts, action.payload];
        case "EDIT_SINGLE_BLOG_POST":
            return posts.map((post) =>
                post._id === action.payload._id ? action.payload : post
            );
        case "UPVOTE_SINGLE_BLOG_POST":
            return posts.map((post) =>
                post._id === action.payload._id ? action.payload : post
            );
        case "DELETE_SINGLE_BLOG_POST":
            return posts.filter((post) => post._id !== action.payload);
        default:
            return posts;
    }
};
We've gone over quite a lot of material to give you the knowledge you need to build a fully-fledged MERN stack application from absolute scratch.
The complete source code can be found here.
https://github.com/pramit-marattha/MERN-awesome-blog
Conclusion
In the first section of this blog tutorial, we built the back-end server using Node.js, Express, and MongoDB. We used the Mongoose library to connect the Node.js / Express server to MongoDB, and then in the second section of this tutorial, we created the React front-end application and also used redux for managing our states globally for our MERN stack blog application. Cheers !! Happy Coding !!
Main article available here => aviyel.com/post/1304
Happy Coding!!
Follow @aviyelHQ or sign-up on Aviyel for early access if you are a project maintainer, contributor, or just an Open Source enthusiast.
Join Aviyel's Discord => Aviyel's world
Twitter =>[twitter.com/AviyelHq]